

How To Add Caption To Image In Word
Word for Microsoft 365 Word 2021 Word 2019 Word 2016 Give-and-take 2013 Word 2010 Give-and-take 2007 More...Less
You tin add captions to figures, equations, or other objects. A caption is a numbered label, such every bit "Figure 1", that y'all tin add to a figure, a tabular array, an equation, or another object. It's comprised of customizable text ("Figure", "Table", "Equation" or something else that you type) followed by an ordered number or letter ("ane, 2, 3..." or "a, b, c..." typically) which tin can be optionally followed by some additional, descriptive, text if you similar.
1. Text that you select or create.
2. Number that Word inserts for yous
If you later add, delete, or motility captions, you tin can easily update the caption numbers all at once.
You lot tin also utilize those captions to create a table of the captioned items for example, a table of figures or a tabular array of equations.
What do you want to do?
Click the topic, or topics, below that interest you.
Tip:If y'all want to be able to motion the effigy and caption as 1 object, or wrap text around the figure and caption, follow the instructions for adding captions to floating objects below.
-
Select the object (table, equation, figure, or another object) that y'all want to add a caption to.
-
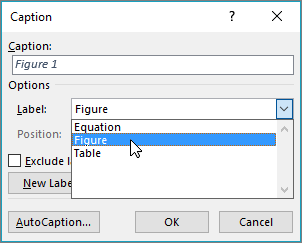
On the References tab, in the Captions group, click Insert Caption.
-
In the Characterization listing, select the label that best describes the object, such as a figure or equation. If the list doesn't provide the characterization you want, click New Label, type the new label in the Characterization box, and so click OK.
-
Type any text, including punctuation, that you want to appear subsequently the label.

-
Click OK.
Note: Discussion inserts the sequential caption number as a field. If your caption looks similar to "Effigy {SEQ Table \* ARABIC}", Word is displaying field codes instead of field results. To see the explanation usually, press ALT+F9.
If you lot want to be able to wrap text effectually the object and explanation, or yous want to be able to move the object and the caption as one unit, you need to group the object and the explanation together.
-
Insert your figure.
-
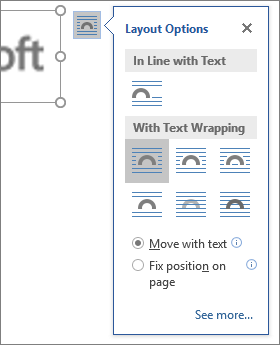
Choose Layout Options and select i of the With Text Wrapping choices.
Important:You should do this step earlier you insert your caption. If you've already inserted the explanation, delete it, do this footstep, then re-add your caption.
-
Add together your caption using the steps listed in "Add together captions" above.
-
Select your caption then concur down the shift key and select your effigy.
-
Right click on either item and cull Group > Grouping.
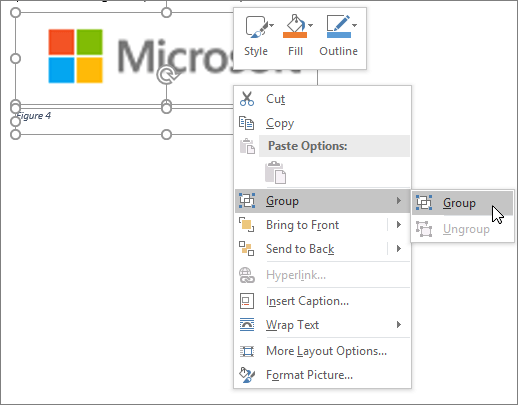
Now text should flow around your effigy and caption every bit expected, and the figure and caption volition stay together if you move them somewhere else on the page or in the document.
Note:If you move your figure it's a good idea to update your caption numbers (see below) only to make sure your numbering is still in the correct social club.
If yous insert a new caption, Word automatically updates the explanation numbers. Nonetheless, if y'all delete or move a caption, you must manually commencement a caption update.
-
Click anywhere in the document and printing CTRL+A to select the entire certificate.
-
Right-click, so choose Update Field on the shortcut menu. All of the captions in the certificate should now be updated.
Tip:You can also update captions by selecting the entire document and then pressing F9.
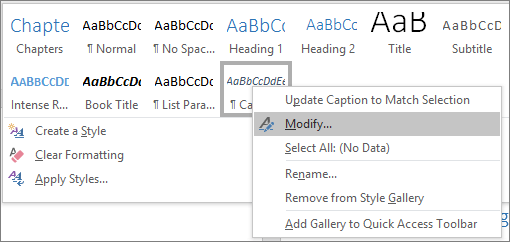
Once you've added at least one explanation to your document you should meet a new manner displayed on the way gallery called "Caption". To change the formatting of your captions throughout your certificate simply right-click that fashion on the gallery and choose Modify. Here yous can set font size, color, type and other options that volition utilise to your captions.
For more data nigh modifying styles in Discussion run into Customize styles in Word
To delete a caption select it with your mouse and press Delete. If you take additional captions in your certificate when you're finished deleting the ones you want to remove, you should update them. Press CTRL+A to select all of the text in your document and and so printing F9 to update all. That will ensure that your caption numbers are correct after you've removed the ones you lot didn't want.
See also
-
Add chapter numbers to captions in Word
-
Insert a table of figures
Exercise you accept a question virtually captions in Word that nosotros didn't answer here?
Mail a question in the Give-and-take Answers forum.
Aid us improve Word
Exercise you have suggestions about how nosotros can improve captions (or whatever other feature) of Word? If so, let u.s. know by providing us feedback. See How exercise I give feedback on Microsoft Office? for more data.

How To Add Caption To Image In Word,
Source: https://support.microsoft.com/en-us/office/add-format-or-delete-captions-in-word-82fa82a4-f0f3-438f-a422-34bb5cef9c81
Posted by: adamsexperearie.blogspot.com
0 Response to "How To Add Caption To Image In Word"
Post a Comment